Tips, Hints, and Possibly Secrets in Stained Glass.
Lamps
|
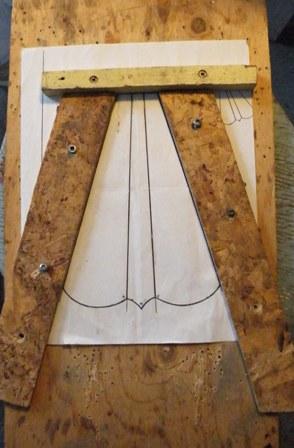
We have made a lot of panel
lamps over the years. One of the best tips we have for getting results is to make the panels the
same size. We use our trusty jig Our jig is a piece of plywood
for a base with a straight piece of wood (strapping) across the top and If you look really carefully you will see all the holes from previous projects. Even with all the use, this jug lasts for years and is easily replaced. |
Once
you have the panels for your lamp ready you need to stand the lamp
(more on that later) and complete the soldering process. We
tack the panels in place and solder the inside first. 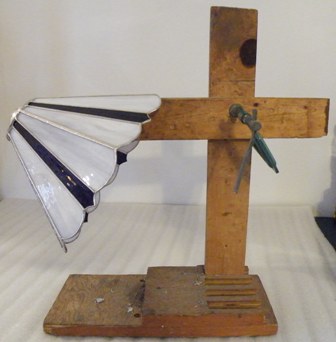 To solder the outside lines
you need at least 3 hands, one to hold the lamp, one to hold the
soldering iron, and one to hold the solder. And since I don't
believe any of us have three hands, you need another jig. To solder the outside lines
you need at least 3 hands, one to hold the lamp, one to hold the
soldering iron, and one to hold the solder. And since I don't
believe any of us have three hands, you need another jig. 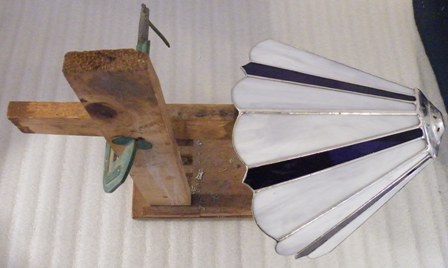 This one will hold the lamp at the necessary angle so you can use your hands to hold the solder and the iron. We hold the arm of the jig to the upright using a C-clamp so that the angle can be adjusted. Make sure there is enough weight at the base of the jig so the lamp won't tip. |
| Back
to Hints, Tips and Possibly Secrets |

home l panels l lamps l gifts l shoppe l ramblings
All photos and site design copyright: Village Glassworks 2006 - 2012.